

Business Plus Accounting Touch POS Quick Start Guide |
Contents
Initial System Startup 3
Defining Employees 4
Creating Your Sales Menu 5
Adding Product Information to Your System 5
Changing Menu Tab Names 6
Adding Buttons To Your Sales Menu 7
Adding Sales Tax 7
Clocking In and Out of the Time Clock 9
How to Create an Order 10
How to Close a Sale 11
Initial System Startup
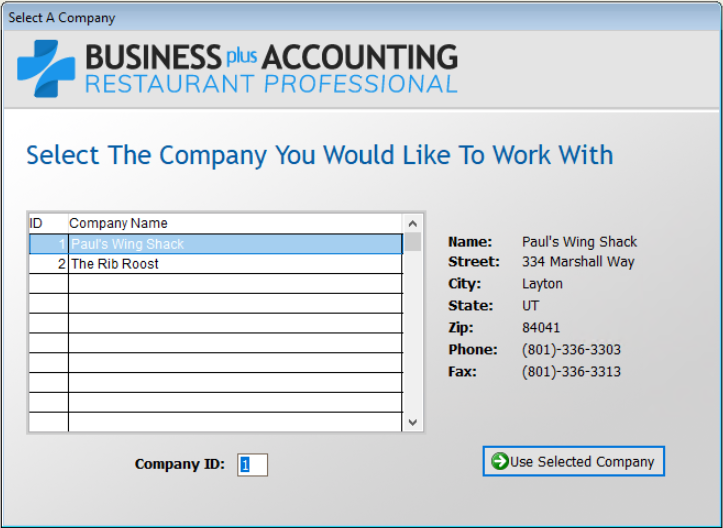
When you initially open the BPA software, you will be asked to enter your company information. At minimum, you should enter your company name. All other information can be entered later by going to Definitions🡪Companies🡪Modify.
Defining Employees
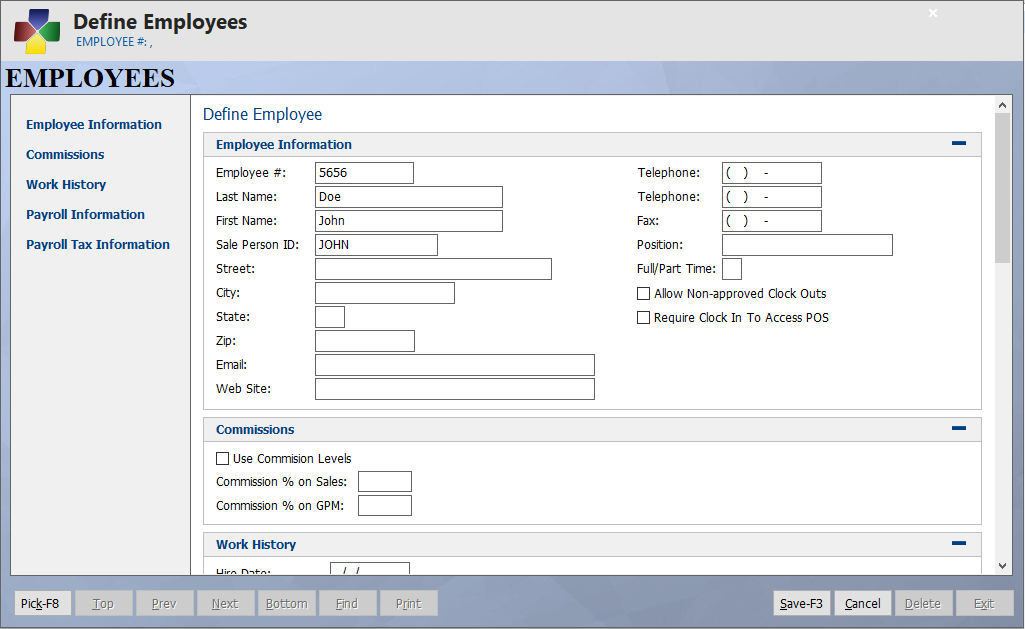
The first thing you should do is create an employee in the system. To do this, go to Touch Screen POS🡪POS Manager Functions🡪Define Employees🡪Add. At minimum, you will want to fill out the following fields:
- Employee # - This is a number that you will define for each employee. Most of our customers will use the last 4 digits of each employee’s Social Security number for this field.
- Last Name.
- First Name.
- Sale Person ID – When a sale is made in the software, this field will be printed on the customer receipt, indicating who made the sale. We recommend either entering the Employee number, or the first name of the employee.
Creating Your Sales Menu
To create your sales menu, you should perform the following steps:
Adding Product Information to Your System
Anything that may possibly be sold in the system should be defined as a product. To create the product record, perform the following steps:
- Go to Touch Screen POS🡪POS Manager Functions🡪Define Products🡪Add.
- At minimum, fill out the following fields:
- Product/Service – This will be the name of the product that you are selling. For example, if you are selling crushed ice, you can enter “Crushed Ice” in this field.
- UPC Code – If you purchased a bar code scanner with your system, you will be able to sale items by scan the product’s bar code. Scan or type in the product’s UPC Code in this field.
- Description 1 – Again, this is the name of the product you are selling. This field appears on the customer receipt, so try not to use any abbreviations in this field. If you run out of space, you can use Description 2 and 3.
- Product Type – This field allows you to categorize the product for reporting purposes. Using our “Crushed Ice” example, you can place this product under the “Food Items” category. Press the F8 key to view a list of categories, and then select the appropriate category.
- If you need to add an additional Product Types to the system, you can do this by going to Touch Screen POS🡪 POS Manager Functions🡪Define Products🡪Define Product Types.
- Sales Taxable – Place a Y in this field if this product needs to be taxed.
- Price Level 1 – This is the price that you are charging for this product.
- Press Save when finished.

Changing Menu Tab Names
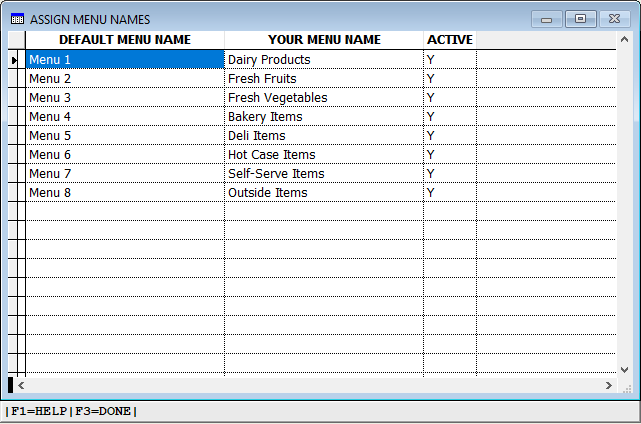
On your sales menu, you can have up to eight (8) tabs.
To change the tab names, perform the following steps:
- Go to Touch Screen POS🡪POS Manager Functions🡪Assign Menu Names.
- Change the menu names as needed, then press the F3 key on your keyboard.
Adding Buttons To Your Sales Menu
Once you have created all product records and created menu tabs, you can now begin placing products into your menu. To do this, perform the following steps:
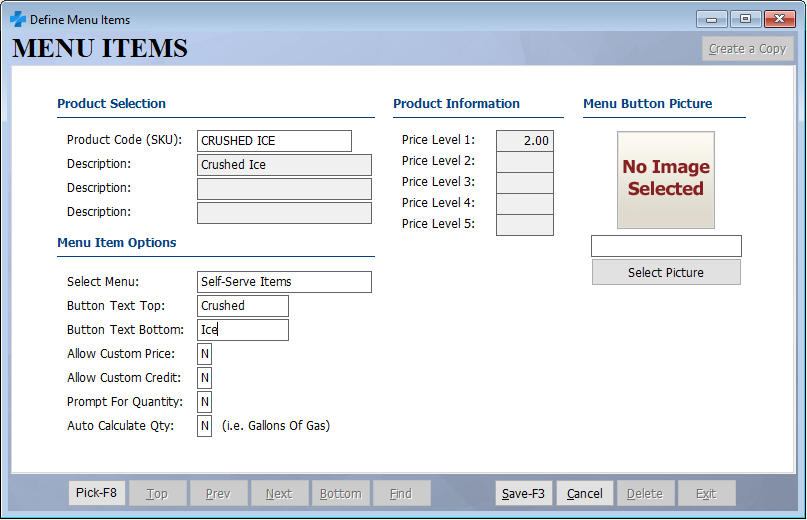
- Go to Touch Screen POS🡪POS Manager Functions🡪Define Menu Items🡪Add.
- Enter the following fields:
- Product Code(SKU) - This is the name of the product that you added in Define Products. To view a list of these products, press the F8 key on the keyboard.
- Select Menu – This is where you will place the product in the appropriate menu tab on your sales menu. To view a list of your menu tabs, select the F8 key on the keyboard.
- Button Text Top/Bottom – This is the text that will show on the button on your menu. Using the Crushed Ice example, you could just enter “Crushed Ice” in this field.
- Each line allows you to type in ten (10) characters. So, if you do not have enough space on the Button Text Top, you can use the Button Text Bottom to fill this space.
- Press Save when finished.
You have now successfully added products to your sales menu.
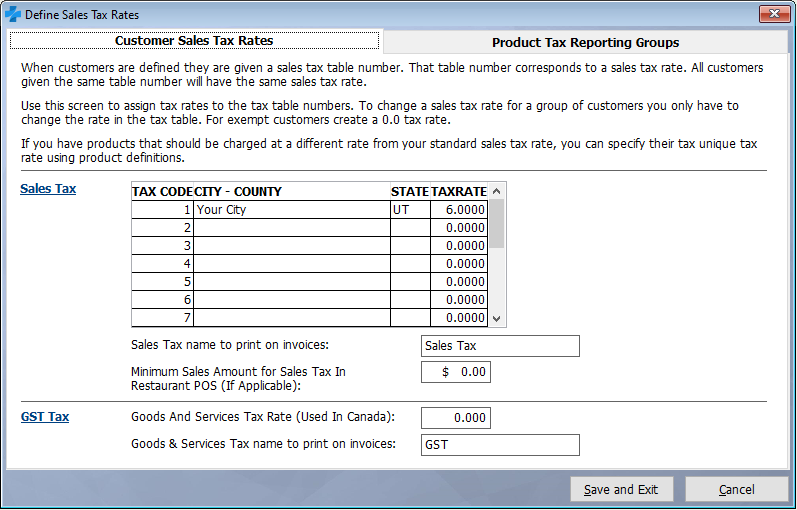
Adding Sales Tax
To enter your sales tax percentage, perform the following steps:
- Go to Definitions🡪Sales Tax Table.
- Under Tax Code 1, enter your City, State, and Tax Rate.
- Press Save and Exit when finished.
Clocking In and Out of the Time Clock
Before you can perform sales in the system, you must be clocked into the time clock. To clock in, perform the following steps:
- Go to Touch Screen POS🡪Cashier Clock In/Clock Out🡪Employee Clock In.
- Enter the employee number you wish to clock in, and then press OK.
- You should now receive a message that says “Employee Login Successful.”

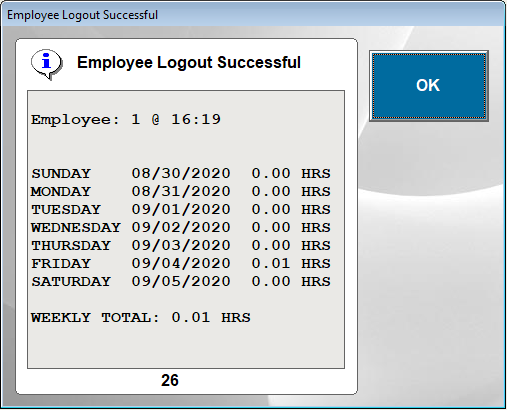
At the end of the day, to clock out of the time clock, perform the following steps:
- Go to Touch Screen POS🡪Cashier Clock In/Clock Out🡪Employee Clock Out.
- Enter the employee number you wish to clock out, and then press OK.
- You should now receive a message that says “Employee Logout Successful.”
How to Create an Order
Once you have created an employee, and you have built your sales menu, you can begin creating sales in the system. Remember, you must be logged into the time clock to ring up sales.
To create an order, perform the following steps:
- Go to Touch Screen POS🡪POS Sales.
- A Server Log In screen will appear. Enter your employee number, then press OK.
- At this point, you may begin adding items to the ticket.

How to Close a Sale
To close a sale, perform the following steps:
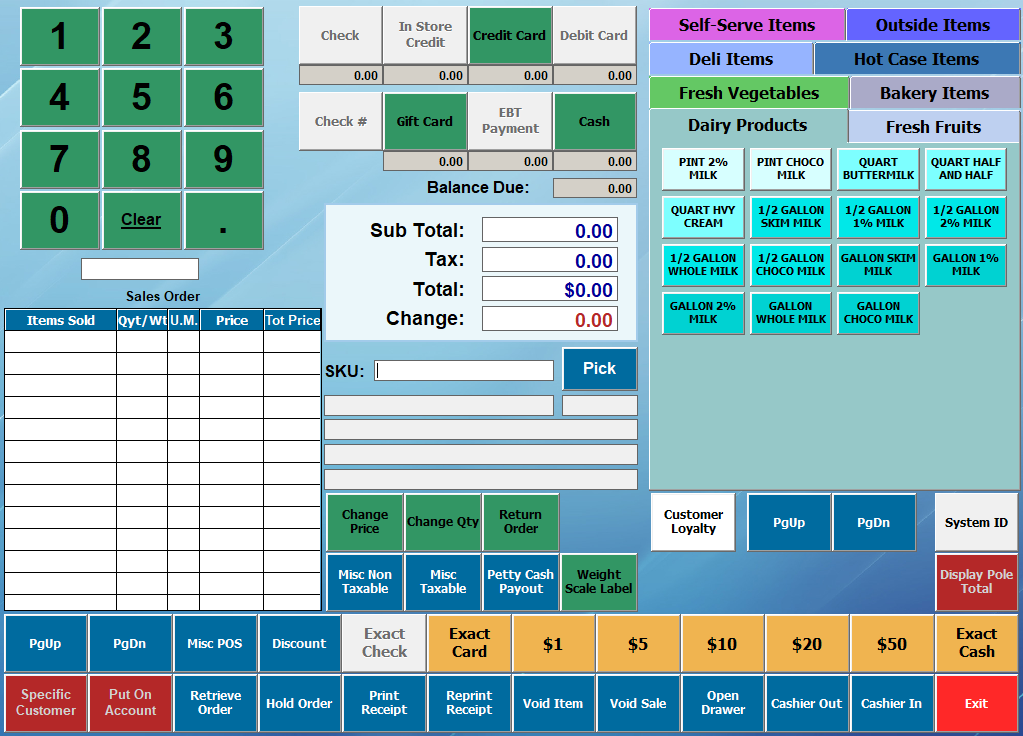
- On a typical sale you will use the row of yellow buttons at the bottom of your screen which we call quick cash out buttons. Simply click the appropriate button and the sales will be closed. For example, if the customer gave you a $20 bill, then select “$20.” If they pay with a credit card select “Exact Card.”
- The sale will now be closed.


On occasion a customer may give you an odd cash amount or want to split the sale between two types of payment. To close out a sale in this scenario do the following:
- Using the keypad in the upper left corner of the screen, type in the amount the customer gave you. For example, if the customer gave us $20.42, then enter “20.42.”
- Select the appropriate payment button at the top of the screen.
- The sale will now be closed.
- For multiple forms of payment repeat steps 1 and 2 until the full payment has been received. Always enter the cash amount first! For example, if this customer gave us $1 cash and wanted to put the rest on a card you would do the following:
- Type 1 on the green keypad and select cash.
- Type 1.42 on the green keypad and select card.
- The sale will now we closed.


If you have any other questions, feel free to give us a call at 801-336-3303.