
BPA Hotel and Property Management Quick Start Guide |
Contents
Initial System Startup 3
Defining Employees 4
Setting Up Your Front Desk 5
Defining Room Tabs Within The Front Desk. 5
Defining Room Types 6
Defining Rooms 7
Assigning Rooms to Tabs 8
Adding Sales Tax 9
Clocking In and Out of the Time Clock 10
How to Create a Reservation 11
How to Check Out a Room 12
Initial System Startup
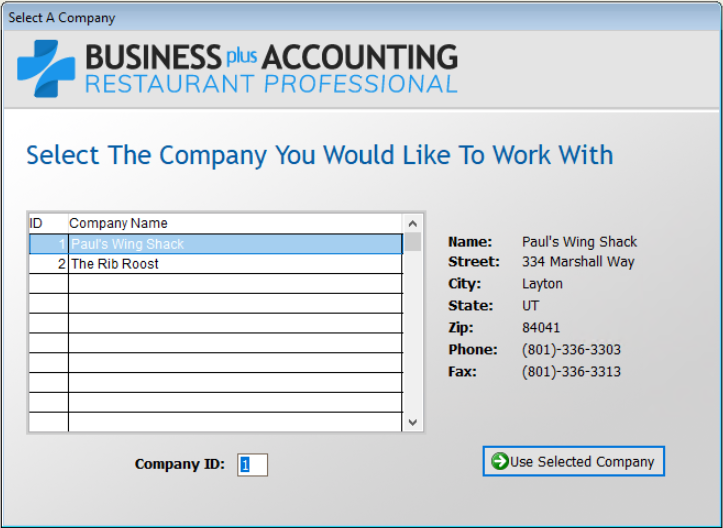
When you initially open the BPA software, you will be asked to enter your company information. At minimum, you should enter your company name. All other information can be entered later by going to Business System 🡪Definitions🡪Companies🡪Modify.
Defining Employees
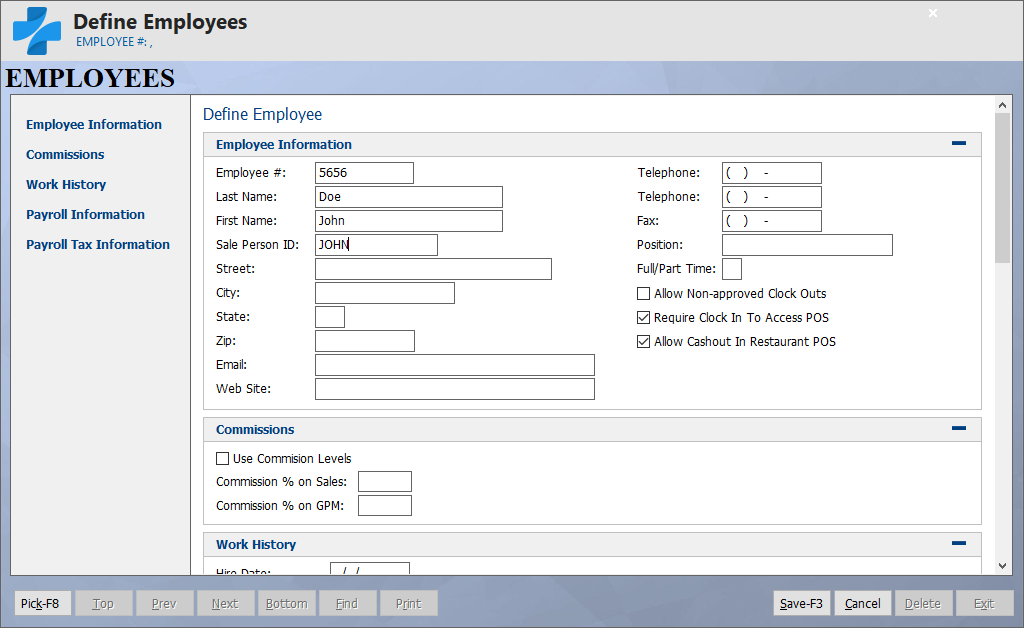
The first thing you should do is create an employee in the system. To do this, go to Hotel Management🡪Manager Functions🡪Define Employees🡪Add. At minimum, you will want to fill out the following fields:
- Employee # - This is a number that you will define for each employee. Most of our customers will use the last 4 digits of each employee’s Social Security number for this field.
- Last Name.
- First Name.
- Sale Person ID – When a sale is made in the software, this field will be printed on the customer receipt, indicating who made the sale. We recommend either entering the Employee number, or the first name of the employee.
Setting Up Your Front Desk
To setup your Front Desk, you should perform the following steps:
Defining Room Tabs Within The Front Desk.
All of your room information will need to be added to the system. This includes room numbers, pricing/rates, etc. First, you will want to adjust the Room Tabs on your Front Desk screen. You can have up to fourteen (14) different tabs on your Front Desk.
To define Room Tabs, perform the following steps:
- Go to Hotel Management🡪Manager Functions🡪Assign Room Tab Names.
- Change the menu names as needed, and then press the F3 key on your keyboard.
Defining Room Types
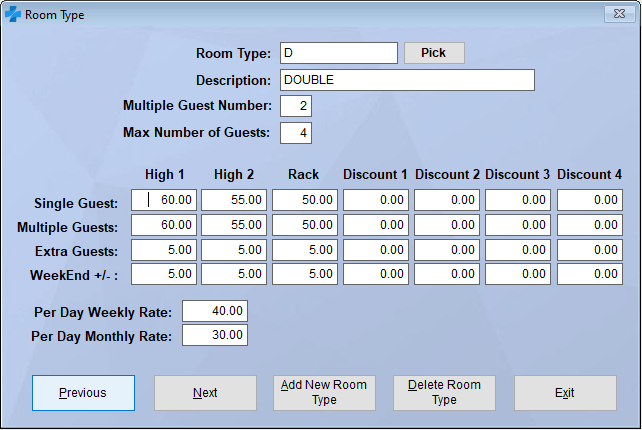
The BPA Hotel and Property Management software allows you to define Room Types, each with specific rate. For example, you can have room types called King, Double, Queen, etc. Each of those room types can have different rates, such as High, Rack, and Discount. The system also allows you to define a Per Day Weekly Rate, and a Per Day Monthly Rate, for extended stay reservations.
To define Room Types, perform the following steps:
- Go to Hotel Management🡪Manager Functions🡪Define Room Types.
- Click the Add New Room Type button.
- The following fields will need to be entered:
- Room Type – This is an abbreviation of the room type you are entering. For example, for a “Double” room type, you can enter “D”.
- Description – This is the full name of the room type. Using our “Double” example, you can enter “Double” in this field.
- Multiple Guest Number – This is the number of guests that you allow on a multiple occupancy room before you will charge an extra guest fee.
- Max Number of Guests – This is the maximum number of guests that you allow in this type of room.
- Single Guest/Multiple Guests – Enter the price you will charge for each rate type (i.e. High1, High2, etc.).
- Extra Guests/Weekend - Enter the extra charge that will be applied for Extra Guests/Weekend guests. For example, if you are charging $5.00 extra for Weekend, High rate customers, enter “5.00” in the appropriate field.
- Per Day Weekly/Monthly Rate – These rates are used for extended stay reservations.
- To save the room type, press the Next, Previous, or Exit button.
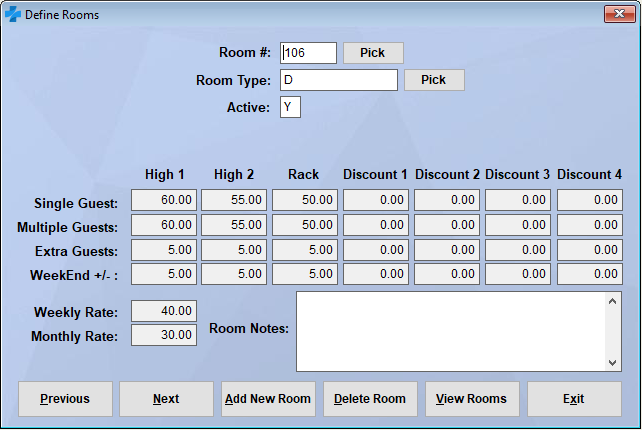
Defining Rooms
After defining your room types, you will then define each room and assign room types to those rooms. To do this, perform the following steps:
- Go to Hotel Management🡪Manager Functions🡪Define Rooms.
- Click the Add New Room button.
- The following fields will need to be entered:
- Room Number – This the room number of the room you are adding.
- Room Type – This assigns the room as a King, Double, Queen, etc. room type. Press the Pick button to view a list of room types.
- Active – This allows you to mark the room as Active or Inactive. Enter Y for Active…N for Inactive.
- To save the room type, press the Next, Previous, or Exit button.
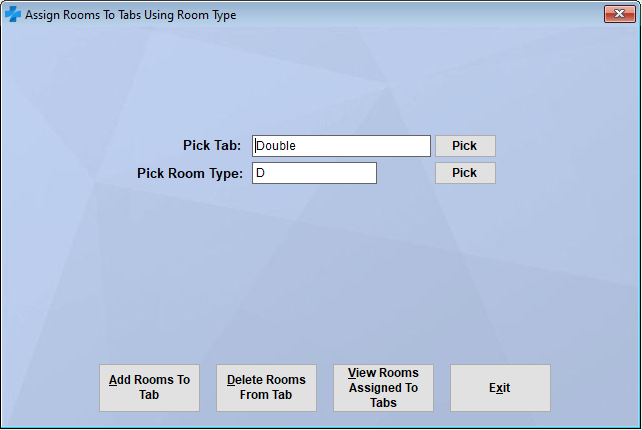
Assigning Rooms to Tabs
After all rooms have been defined and assigned a room type, you will now need to assign those rooms to tabs on your Front Desk screen.
Note: This function must be performed if any changes are made to your rooms (i.e. adding new rooms using the Define Rooms function).
To Assign Rooms to Tabs, perform the following steps:
- Go to Hotel Management🡪Manager Functions🡪Assign Rooms to Tabs.
- The following fields need to be entered:
- Pick Tab – Enter the tab from your Front Desk screen that you would like to adjust. For a list of tabs, press the Pick button next to this field.
- Pick Room Type – Select the room type that you would like to be assigned to this tab. For a list of Room Types, press the Pick button next to this field.
- Press the Add Rooms to Tab button when finished.
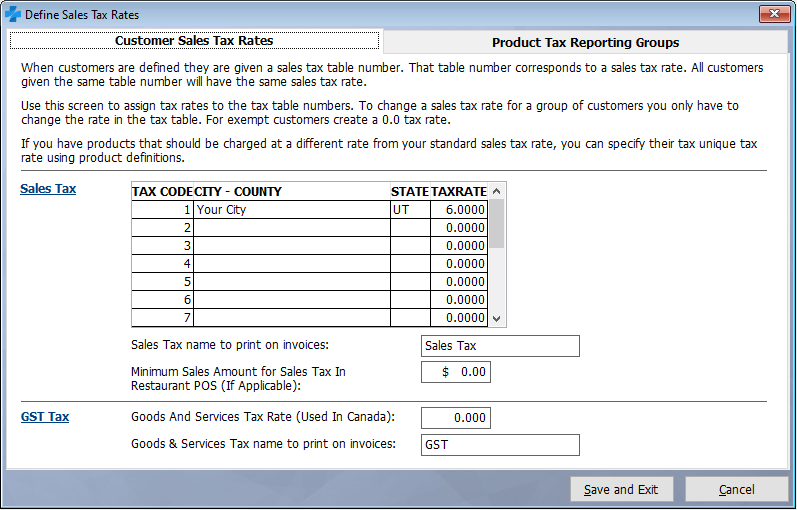
Adding Sales Tax
To enter your sales tax percentage, perform the following steps:
- Go to Business System🡪Definitions🡪Sales Tax Table.
- Under Tax Code 1, enter your City, State, and Tax Rate.
- Press Save and Exit when finished.
Clocking In and Out of the Time Clock
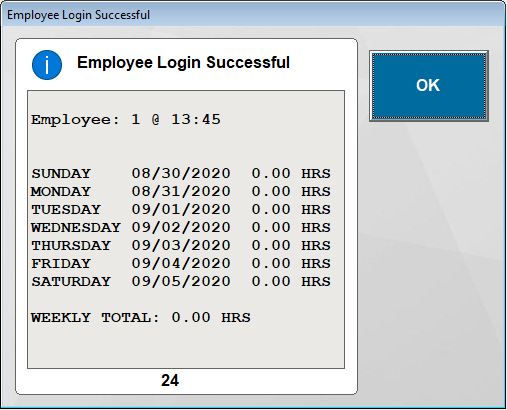
Before you can perform sales in the system, you must be clocked into the time clock. To clock in, perform the following steps:
- Go to Hotel Management🡪Employee Time Clock🡪Employee Clock In.
- Enter the employee number you wish to clock in, then press OK.
- You should now receive a message that says “Employee Login Successful.”
At the end of the day, to clock out of the time clock, perform the following steps:
- Go to Hotel Management🡪Employee Time Clock🡪Employee Clock Out.
- Enter the employee number you wish to clock out, then press OK.
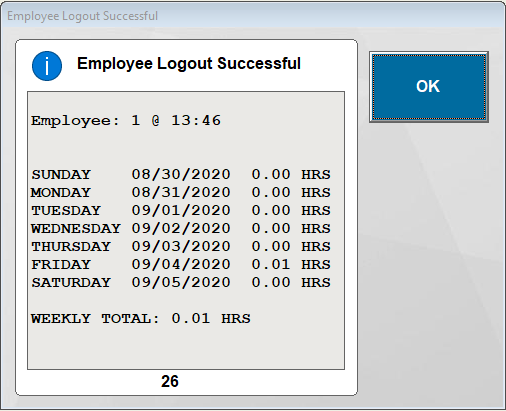
- You should now receive a message that says “Employee Logout Successful.”
How to Create a Reservation
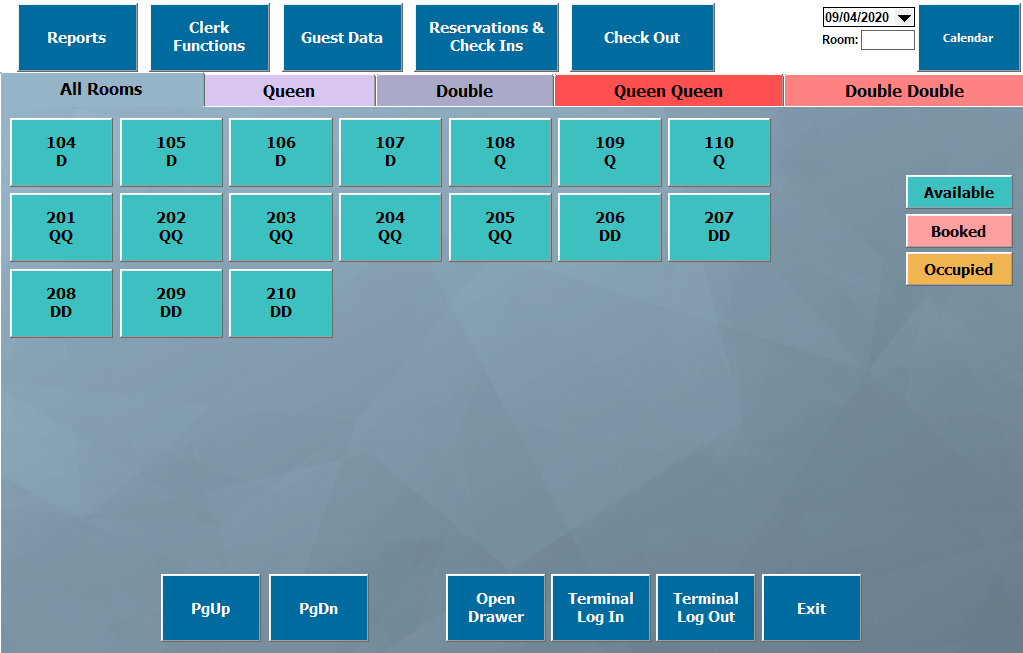
Once you have created an employee, and you have added rooms to your Front Desk, you can begin creating reservations in the system. Remember, you must be logged into the time clock to create reservations.
To create a reservation, perform the following steps:
- Go to Hotel Management🡪Front Desk.
- An Employee Log In screen will appear. Enter your employee number, and then press OK.
- You will then see your Front Desk screen with all of your rooms. Rooms in Green are Available. Rooms in Yellow are Occupied…and rooms in Pink are Booked. To create a new reservation, click Reservations & Check Ins button.
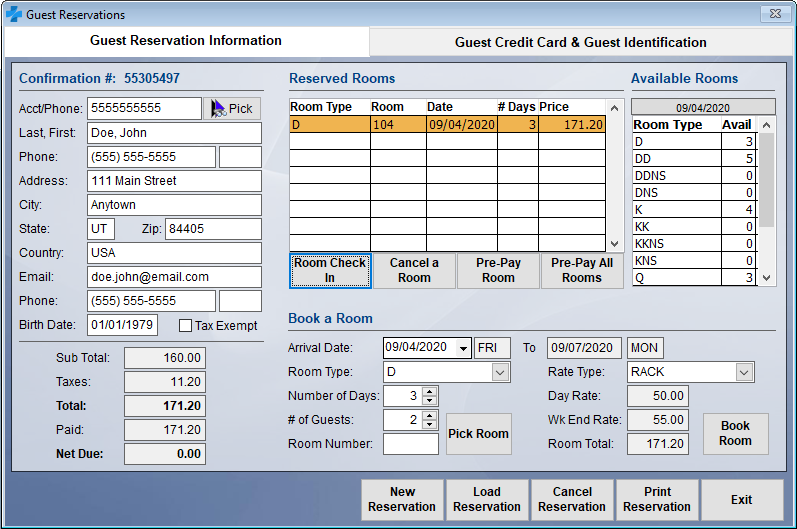
- In the Reservations and Check Ins screen, the following fields needs to be entered:
- Acct/Phone Number – Each time a reservation is made, the system will store that customer’s information for future use. In this field, enter an account number or the customer’s phone number.
- Last, First (Name).
- Phone.
- Address.
- Fill out the following information in the Book a Room section:
- Arrival Date.
- Room Type – Use the drop down menu to select the appropriate room type.
- Number of Days – This is the number of days the customer will be staying.
- # of Guests – This is the number of guests staying in the room.
- Room Number – Enter the room number you are creating the reservation for. To view a list of rooms, press the Pick button.
- Rate Type – Select the appropriate rate type for this reservation.
- At this point, you can book the room by clicking the Book Room button.
- When the customer arrives, you can click the Check In Room button.
How to Check Out a Room
To check out a room, perform the following steps:
- Go to Hotel Management🡪Front Desk.
- Click the Check Out button.
- Press the Load Folio button, and select the folio you want to check out.
- Press the Check Out Room button.
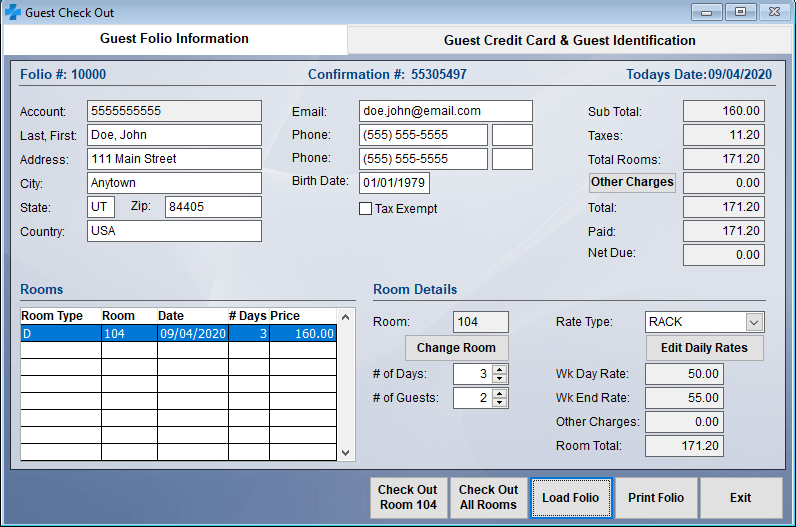
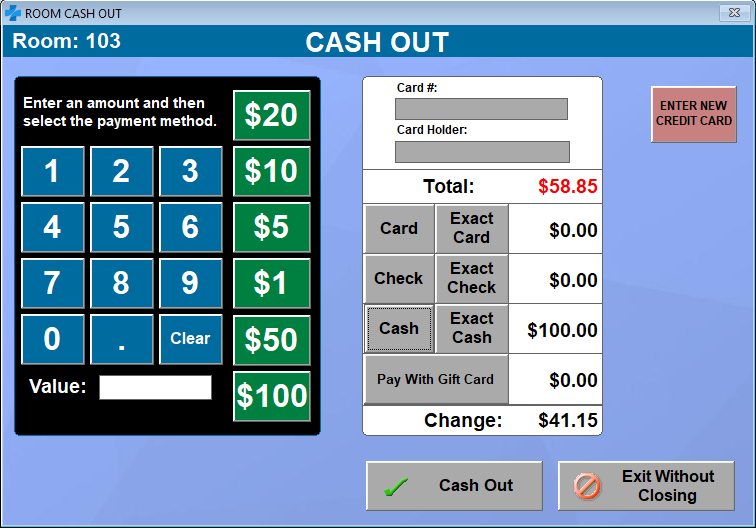
- You will next be presented with the Cash Out screen.
- Using the number pad, type in the amount that the customer is giving you. For example, if the customer gave you a $200, then enter “200.00.”
- Press the appropriate payment type button. For example, if the customer gave you cash, click the Cash button
- Press Cash Out.
If you have any other questions, feel free to give us a call at 801-336-3303.